DeepFaceLab: A Comprehensive Guide to Creating Realistic Deepfakes. In the rapidly evolving world of AI and machine learning, deepfakes have emerged as a fascinating, yet controversial, application. Deepfakes, or synthetic media in which a person’s likeness is swapped with another’s, have been making waves in the realms of entertainment, politics, and social media. While the ethical implications of this technology are a subject of intense debate, there’s no denying the impressive capabilities of deepfake software. One such powerful tool is DeepFaceLab, an open-source software that enables users to create high-quality deepfakes with relative ease. In this tutorial, we’ll guide you through the process of creating your own deepfakes using DeepFaceLab, from initial setup to final output. Whether you’re a budding deepfake artist or a curious tech enthusiast, this comprehensive guide will help you navigate the fascinating world of DeepFaceLab.
Prefer watching? Here’s video:
Step 1: Download and Install DeepFaceLab
- Visit the official DeepFaceLab GitHub page: https://github.com/iperov/DeepFaceLab
- Download the latest build available for your operating system.
- Extract the downloaded file to a location of your choice.
Step 2: Gather Your Data
- You will need two sets of video footage: the source (the face you want to superimpose) and the destination (the video where you want the face to be superimposed).
- Save these videos in the respective folders:
workspace/data_srcandworkspace/data_dst.
Step 3: Extract the Faces
- Run the script
data_src.batto extract faces from the source video. - Do the same for the destination video using
data_dst.bat. - This will create a set of images for each video in their respective directories.
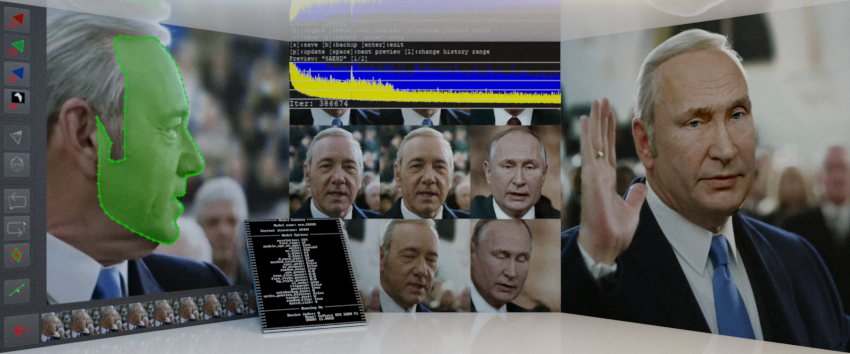
Step 4: Train Your Model
- Choose the model you want to train. For beginners, the
H128model is a good starting point. - Run the
train.batscript and select your chosen model. - The training process will start. This can take a long time depending on your hardware. You should let it run until the loss value stops decreasing significantly.
Step 5: Convert the Destination Video
- Once your model is trained, you can use it to convert the faces in the destination video.
- Run the
convert.batscript and choose your trained model. - This will create a new video in the
workspacedirectory with the source face superimposed onto the destination video.
Step 6: Finalize and Review Your Video
- Review the output video for any inconsistencies or issues.
- If you’re not satisfied with the result, you can adjust the settings and retrain your model.
Disclaimer: Deepfakes can be used for fun and entertainment, but they also have potential for misuse. Always get consent from the people whose faces you’re using and never use deepfakes to deceive, harm, or spread false information.
Please note that this is a basic tutorial and DeepFaceLab has many more advanced features and options you can explore. For more detailed instructions, refer to the official DeepFaceLab GitHub page or other trusted resources.